Monday, December 17, 2012

Finished off the sheer clamps

Just a quick update tonight...

Over the weekend, I installed the sheer clamps.

Actually, I installed the top half of the sheer clamps.

Tonight I installed the bottom half: A little 1" x 3/4" stick that runs along the bottom of the sheer clamps installed previously. You'd think it would have been a trivial job, but I still managed to spend almost three hours on it!

With the sheer clamps in place, its amazing how much they stiffen up the sides of the boat.

Sunday, December 16, 2012

Sheer clamps in place

Progress has been slow the last few weeks. Between getting busy with other stuff, and a nasty case of the flu, the boat has been neglected.

But there is progress to report!

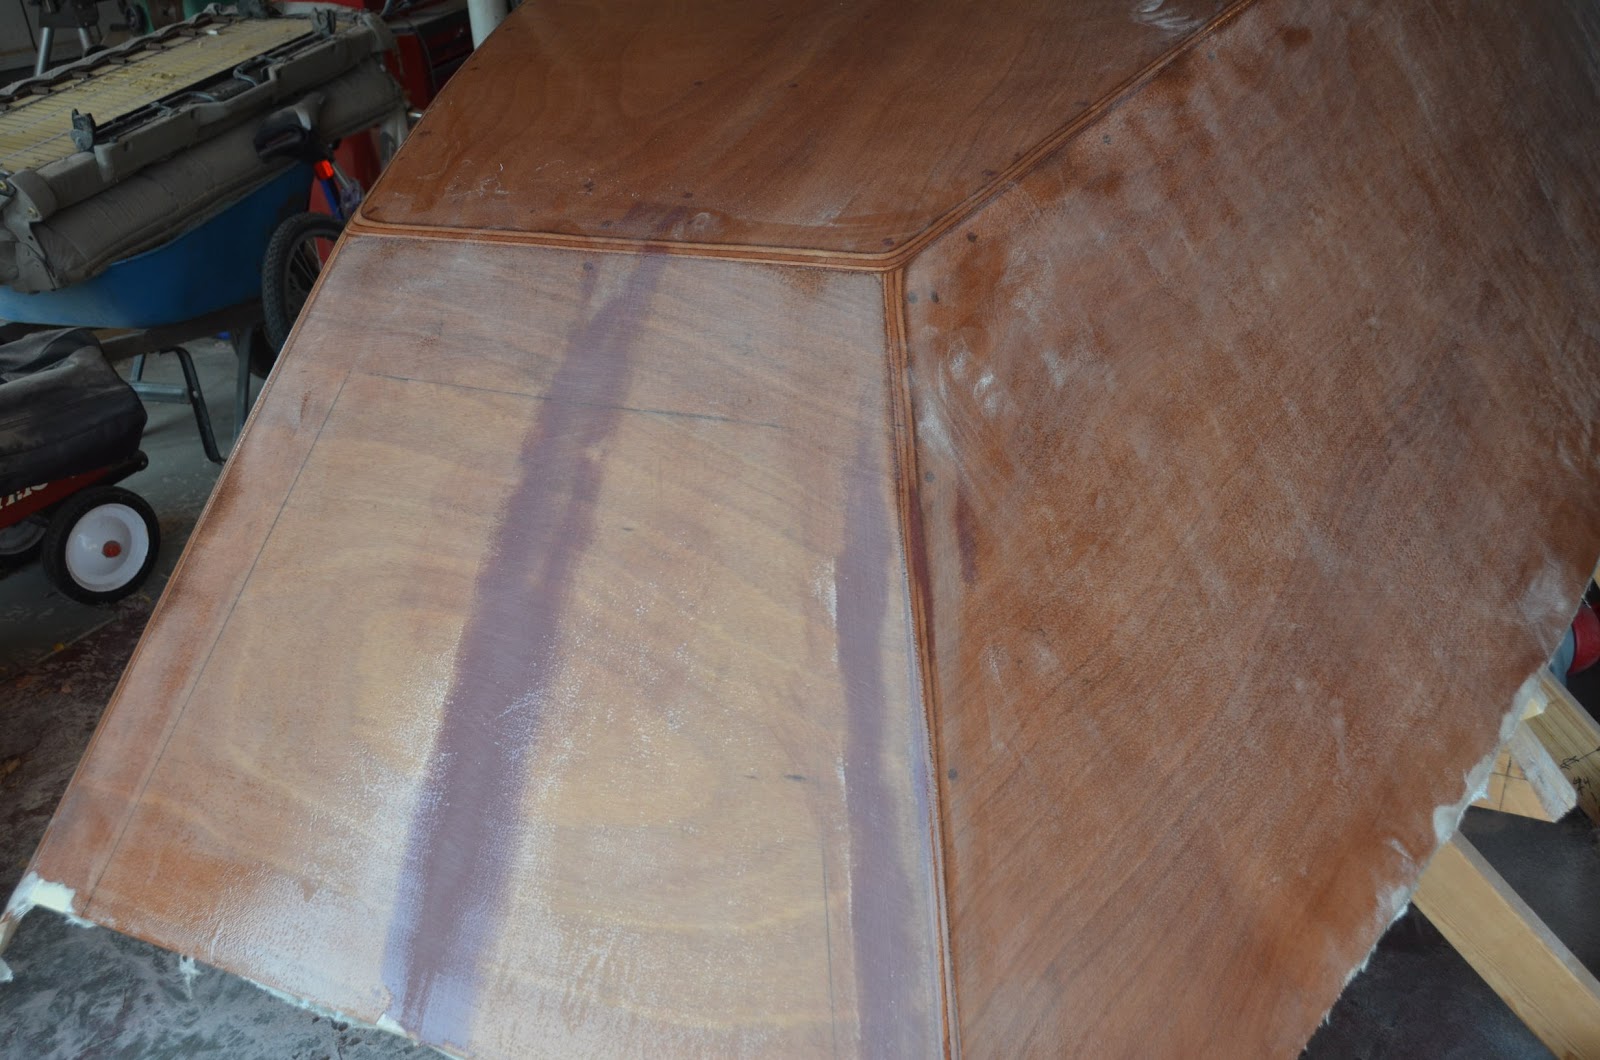
Since our last installment, the hull has been turned over. That's a biggie. Its amazingly light. The teenager next door and I got it done with no problems at all. I built a little stand to hold it. Rolled it over, leveled it off, and here we are.


That's actually the last picture for today's entry, showing the location of the sheer clamps, now fully installed.

Getting those on has been a real trick. I found it very intimidating. This is one area where I really don't like the Barlow plans. What I would prefer would be for Barlow to give us a set of exact offsets (from the chine logs), at measured intervals, to establish the location of the sheer clamps. Instead, there is nothing like that. And this is a critical area. Once the sheer clamps are in position, then for all practical purposes the shape of the boat is set. This step matters.

There is an offset provided from the OUTSIDE of the hull at the bow (which is useful), and an offset provided from the top (as the boat sits when right side up) of the planking at the stern (which is useless, since the exact width and position of that plank is not reliable), but that is it. Other than that, there is an enormous amount of rather vague and hard to follow discussion of various techniques and approaches...all of which could be easily replaced by a simple series of offset points.

Alas.

Having read and re-read the plans, I decided I was pretty much on my own, so I set to it. As I see it, there are two big things that you have to get right when establishing the location of the sheer clamps:
  • Make sure the front deck will lay properly
  • Make sure the boat is symmetrical
That's it. Everything derives from that.

I started by making triply sure that the hull was level, port to starboard. I decided that measuring off the existing hull build was not how I wanted to go, since any minor error so far would just get propagated. Instead, I made my little bullet level my best friend. Everything would be built to level.

First step was to get the sheer clamps dry-fit into position. This meant cutting the ends off at peculiar angles, and trying to get the lengths just right. That was a real trick right there. Lots and lots of test fits and trimming and testing and trimming. Eventually, I got them "close", but the angle cuts never seemed to line up exactly right. No worries. Even though the plans talk about having a tight joint, a butt-joint like that (where the sheer clamps butt up against the transoms) isn't going to give the boat any strength anyway. I don't think it matters if you end up with a 1/8" gap.

Next, I tackled the bow end. I started by cutting a series of straight sticks that I could line up from port to starboard, resting on each sheer clamp.


The plans (in typically obtuse fashion) describe the location of these sticks in two different ways and in two different places. Ignore the plans here.

What matters is this: The overall length of the front deck (measured from the tip of the bow to the front of the cockpit) is created by a single sheet of 4x8 plywood. Therefore it has to end up a smidge under 4 feet long. Allowing for some "room for error", I measured back 3' 9" from the inside face of the bow transom. That was the location of the farthest stick.

I put another stick right up against the transom. That one was easy. 

I then cut two more in the middle, each of those 1' 6" forward (toward the bow) from the one before it. You end up with four sticks spanning thwartship, like the above picture shows.

Next, start with the bow. The plans give you the offset from the outside corner of the hull (where the bottom meets the side and the transom), and you measure up from there. Drill a hole through the side. That's where the top of the sheer clamp goes. I then used my level on the first stick (the one up against the transom) to make sure the stick was level, therefore making sure that the sheer clamps matched, port to starboard.

From there, it was a very tedious process of getting all four sticks level, and making sure that a fifth stick, laid lengthwise across them, made contact with them all. The plans talk about having a 1/4" offset on the middle sticks, but they never explained why, and honestly that made no sense to me. So I ignored it. If they end up off a little as a result, I'll deal with that later.

As you get the sheer clamps positioned at each of the various points, use a clamp and crank it down HARD so as to freeze the position. Its just a matter of lots of trial and error.

The position of the sheer clamps along the rest of the boat is less fiddly. For that, I just cut two more sticks, and made them level. One pretty much right in the middle, one about a foot away from the stern:


And that was that. The sheer clamp position is now established.

Next step is to take a sharpie and mark along the inside of the hull on the top of the sheer clamps the whole length. Then you pull them off and glue and screw them into final position.

I mixed a double-batch of epoxy, and used slow hardener just to be careful (and I have more "slow" than "fast" at this point, so I use it where I can). I thickened it to somewhere between honey and peanut butter, and then slathered a nice thick coat on the sheer clamp (one at a time, of course).

For the glue and screw operation, I found that what worked best was to start with the bow. Position the end of the sheer clamp in position (the rest of it will be laying over the side of the boat...don't even try to bend it into position yet) and then use your third hand to clamp it into place. No need to get it really tight, just make sure you are on the line. Then drill/countersink and screw in a screw as near to the end of the sheer clamp as you can (toward the bow). Now you are locked in, and it gets easier. 

Work your way to stern, about a foot at a time. Bend the sheer clamp into place, align it with the line, clamp it down, drill and screw. 

Once you are about three feet along, you can spring the sheer clamp inside the boat (ie, bring the stern end to the inside of the boat). Use a little spring clamp to hold that end.

Then go back toward the bow, and keep working your way down, a foot or two at a time. I was actually a bit surprised at how easily that went on.

Last step of the day was to scrape off all the squeeze out on the bottom side of the clamp. The top side doesn't matter...its getting trimmed off and sanded flush anyway.

With that, we conclude a long weekend!

Tuesday, November 27, 2012

Off the Jig!!

Great milestone here: The hull is off the jig!

But first, a paint update.

I'm not sure why, but the oil-based primer I got from Home Depot truly doesn't like to dry in cool weather. The propane heater made a huge difference.

I ended up with two layers of primer. Then I got my finish coat: Behr Interior/Exterior High Gloss Enamel. I picked a dark blue from the Behr color chart called "Night Tide".

Where the primer took forever to dry, the enamel dried almost instantly. I painted it in sections of about four square feet, using a small, smooth roller and then tipping off the finish with a sponge brush. I'm not really concerned with the quality of the finish on the bottom. This was mainly about practicing for when it comes time to do the deck and the sides.

All told, it went pretty well. Like I said, that stuff dries FAST, so if you are going to tip, don't get too far ahead of yourself of the paint will be too dry.

I ended up with a total of four coats. I sanded fairly aggressively after the first coat, then lightly after the second. The third and fourth I just put down as it was. Considering I didn't make any effort to get the bottom smooth in the first place, it looks really good. I think the sides and deck should come out very nice, although I think I might try a boar's bristle brush instead of the sponge brush for the tipping.

Back to the de-jigging. First thing I did was to grab one of my daughters to help, and then mark the width of the hull at three points. The plans say that it might tend to straighten out and/or "narrow up" once its of the form, so this way I have measurements that I can use to put in temporary spacers if necessary.

Next step was to crawl underneath and mark off some reference points on the keelson. I hit most of the marked points on the strongback, and also marked off the front and rear position of the centerboard box.

Last step was to cut all the Spanish Windlasses that were still holding the hull to the jig. Grabbed a couple of neighbors to help, and just like that, the hull is free:


Actually, it was a little harder than that. First, despite my efforts to mask off the jig, there were apparently some spots where the hull was glued down. It took a bit of tugging to break it free. And it turns out I missed one of the windlasses. Oops.

But a few fits and false starts aside, there it is.

Next step of the night was to tear down the jig. At one point, I had played around with the idea of selling it or maybe reusing it, but practicalities got the better of me. I really don't have a decent place where I could store it, and I'm going to need some framing lumber to build the new jig that will hold the boat while I finish out the interior, so out came the drill and out came the screws and I now have a big pile of scraps waiting for me to re-use:


I did save the strongback intact. I have plans for that later (stay tuned).


And I also took off the flare forms intact. Between the flare forms and the strongback, that's most of the work building the jig anyway. The rest is pretty simple. These are less bulky this way, so I may save them and see if I can give them away to another Pelican builder.


Saturday, November 17, 2012

Some odds and ends

Had some non-boat projects today, so just a little progress.

First, I finally tired of working around all these bicycles. Got some hooks and hung them up.


I ordered this space heater last week off of Amazon. I'm hoping that some heat will get this primer to dry.

Its rated at 80,000 BTU. When its rolling, it really cranks out the heat.

After four days, the first coat of primer was still not 100% dry. A few hours in the heat from this heater seemed to help finish it off. I decided to add another coat and see how it responds:


The primer has even more tint than before, so if that's the problem, we are in real trouble here. We'll see how it feels in a couple more hours...


Wednesday, November 14, 2012

Starting to Prime

I've decided that the way to do this is to paint the bottom now, but leave the sides for later (after the deck is on). With that in mind, I headed over to Home Depot and got a can of oil-based primer.

I want to paint the boat a really dark blue. Looking through the HD color books, they have one they call "Night Tide" that looks pretty good.

Problem is, there isn't enough room in the primer can for enough tint to get it that dark. So we ended up with a pretty ugly blue color instead. That's Lydia helping out. You can also see where I masked off where the centerboard slot is going to be. I'll end up running some glass from the inside of the slot onto the bottom of the boat, and don't want to have to scrape off the paint first.


The primer went on really smooth and easy. Now that we have a little more room in the can, I'm going to run it back up to HD and get more tint added before putting on a second coat.


I put a little electric space heater under the hull. Its pretty chilly right now. I put this first coat of primer down last night, and was surprised that 12 hours later its not full dry. Hmmm....

Once it is dry, I'll hit it with the sanding block, then another coat of primer, or two, (or three) depending. 

Sunday, November 11, 2012

Finally ready for paint!

It was a long day of sanding today. I finally broke down and bought a Porter-Cable 6" random orbit sander. It was clear that without something like that, getting the hull to where I wanted it was going to take forever.

Even with the sander, I spent four hours on this today. Went through 17 sanding pads too.

When I last left the hull, I had hand-sanded it all over, but there were a bunch of small low spots. So I went back over and skim-coated them with some thickened epoxy (used micro-balloons). So the task of the day was to get all that leveled out.

I don't know how to take a picture of "smooth", but here it is: This thing is SMOOTH.


It is dusty too. I spent most of my time on the sides and the transoms, because I want those to end up with a nice gloss finish. I also went ahead and gave the bottom a good once-over, mainly just to scuff it up so the primer adheres well.

I also spent some time last night cutting out the sheer clamps. Way back when I bought my batch of Home Depot lumber, I had set aside a 16' 2x10 with the hope that I could get those boards out of that. It took a lot of doing, because the board was not perfectly clear. I was working my way around knots the whole time. Eventually, I got it. Here's an artsy low-depth-of-field shot of what I ended up with:


They may need a bit of fine-tuning, but that can wait. Its a lot easier running small stock like that through the table saw than trying to cut 10" wide boards.

I also got the other side of the centerboard glassed this morning. Second time around was a lot easier than the first. It turned really cold overnight, so it might take it a few days to fully cure. In the mean time, I'll start glassing the rudder tomorrow.

Saturday, November 10, 2012

Shaping the centerboard and rudder

Did some work with my jack plane and a couple of sanders today. Got the centerboard and rudder all carved up.

The idea is to give them a bull-nose profile on the leading edge, and a taper on the trailing edge. Here's what I came up with:

Found this was a handy way to carve the trailing edge of the rudder:


The centerboard came out pretty nice. Some of the shot I epoxied in last week was standing a little proud, so I sanded it off with a belt sander. I assume the dust from that is pretty nasty stuff. I'm glad I don't do this every day.


Here are the two pieces in final form. To do this, what worked well was to take a jack plane and rough in the bevel. For the bull-nose side, I roughed it in with a block plane. Then I took the belt sander and smoothed it out a bit more. For the final profile, I used my little "mouse" sander, which really gave a nice finish.


Last task of the day was to get a layer of glass on one side of the centerboard. I cut it so it was about three inches bigger than the piece. To get around the corners, I cut a bunch of relief notches. I used a spreader to get the epoxy through the glass on top, then used a 2" chip brush to get the glass bedded in on the underside. It came out pretty well, but there are a few spots I'll have to sand smooth before I glass the other side.

Sunday, November 4, 2012

Adding some ballast

Haven't posted for a few days, since there isn't much visible progress to show. Most of what I've been doing is working on getting the hull as smooth as possible. Mostly that means feathering out the seams on the glass, and trying to eliminate all "texture" from the weave that is printing through.

Here's a few shots of where I'm at with that.


Its coming along slowly but surely. Its just more and more sanding from here. The print-though from the mesh was pretty much reduced to an "orange peel" texture after two coats of clear epoxy. I just need to sand that smooth and it will be ready for primer. Lou Brochetti recommends that I wait a good two weeks after the last coat of epoxy before applying the primer (to ensure it is 1000% cured), so I've got some time.

In the mean time, I decided to tackle the job of ballasting the centerboard and the rudder.

Remember that lovely gooseneck shape on the centerboard that I commented about a few posts ago? Lou recommended that I cut it off, and go with a covered centerboard trunk. As much as I hate to see that lovely shape go away, I think he's right. Covering the trunk will make for a dryer boat. But it also requires a weighted centerboard.

So first things first: Time to trim down the centerboard:


Then I ran down to Cabella's and got two bags (25 lbs each) of No. 9 shot. I got the Number 9 because it was the smallest diameter they had. I figured the smaller the better.


 I wasn't sure how dense this stuff is, so I weighed out one mixing cup's worth...


...then did some calculations based on the approximate size of the cup.


I decided to go a little heavier than necessary. I figure a slightly too heavy centerboard won't hurt me much, but one that's too light will tend to float, so I decided on 20 lbs of shot as my target. All those calculations, and it comes down to a rectangle 10" x 12" will get me what I need.

I started by marking it out on the centerboard. I biased its position toward the leading edge and toward the bottom, but really, I don't think the exact location is that critical:


I then chucked up a big spade bit and drilled out the corners.


Then took my jigsaw and cut it out.


Next, I took some stainless steel screws and put them into the sides, so as to provide a bit of reinforcement to make sure the eventual epoxy/shot block doesn't pop out some day.


Next, I took some plastic and taped it over one side.


And then brad-nailed a piece of scrap plywood over that.


From there, it was just a matter of flipping it over, and then filling it up with shot and epoxy. A little trial and error there, but what I settled on was that the best way to do this is to mix a batch of epoxy, then pour in a bunch of shot into the cup. Stir it up and you end up with what looks like a cup full of fish eggs. Pour it in and repeat until full. I guess my calculations were pretty good, because it ended up taking just about exactly 20 pounds of shot to fill it up.

After it was filled up, I mixed one last batch of epoxy and poured it over the top. Just wanted to make sure the plug is standing a bit proud, so when it comes time to even it off, I can sand a bit off and be good to go.


After getting the centerboard done, all that was necessary was to repeat the whole process on the rudder. I did a little noodling on that, and decided that about 13 pounds would be about right. Really, that's just a guess. I just want to make sure my rudder stays put and doesn't try to float up. The calculations came down to a 10" x 8" rectangle, and again, they proved correct since it took just the right amount of shot to fill it up.


Its probably a bit silly cutting these pieces out of expensive, light weight plywood and then adding ballast to keep them in the water, but that's the way it goes. The way the plans lay out, you only need one piece of 3/4" stock, and you need that for the transoms anyway. In that way, you get the centerboard and rudder for "free".

I'm going to give those plugs a few days to cure. Even using the "fast" hardener, that's a big lump of epoxy in each. No rush here. Next steps are to round off the leading edges, taper the trailing edges, then glass both pieces.

In the mean time, there is plenty of sanding to do on the hull. If I'm going to go with a gloss finish, they aren't nearly smooth enough yet.

Thursday, October 25, 2012

Lots of epoxy

Spent quite a bit of time today getting the epoxy onto the fiberglass. The end result is really nice:


If it weren't for the scars on the plywood from the scarf joints, I'd be tempted to finish this bright.

The glass laid down very easily. The only spot that gave me even the slightest bit of trouble was one of the stern transom corners. I am trying putting a piece of wax paper over it to hold it down while it cures:


Hopefully that takes care of things. If not, I'll have to figure something out.

The day went pretty much according to plan. I got up early this morning and started digging in. I mixed a bunch of triple-batches of epoxy (I lost count how many) as I went, using the "slow" hardener. I used a plastic scraper/spreader to work the epoxy into the glass. It was a pleasant surprise how well the glass stayed in place. I had virtually no trouble with bunching or wrinkling or bubbles or any of that. It went right on.

And it used a BUNCH of epoxy. Took something just short of a half-gallon of resin to get the first coat down. Took me about two hours to get it coated. That would realistically get cut in half if I had had a helper mixing batches as I went. It pretty much takes as long to mix a batch as it took to put it on.

Then I went to the office. I figured the slow hardener would give me plenty of time (particularly since the temps here today are in the low 40's) before it tacked over and was ready for the second coat. 

After work, it was perfect: Just the right "cure" level. Still tacky, mostly.

So I set about putting another coat on, this one designed to fill in the weave. Since the biggest pain from this morning was measuring out the resin (it gets thick in these cooler temps, and the squirt pumps are SLOW) I had the idea of just using the measuring marks on my cups. I get them at a pro auto-body supply place:


And they come pre-marked with measuring lines for just about any proportion of two or three part mix you could need:


I opened a fresh jug of resin, and just poured it in up to the required line. I still used the pump for the hardener...it pumps easier than the resin and only needs half as much.

The second coat required way less mix than the first. I didn't keep track, but I'd guess it was less than 1/3 what the first took. I used a small foam roller I bought at the hardware store today. Went on very nice. I can't say the weave is completely gone, but its close.

For the second coat, I used "fast" hardener. My plan is to get back out there later tonight and get one more coat on, this time thickened with micro-balloons for a fairing compound. At that point, I'll be done until it fully cures. I'll go over it with the longboard and see how smooth it comes out. Then I'll mix up some more thickened epoxy and feather in the joints around the corners. I want them to completely disappear.

All in all, a great day. I was a little worried about this part of the project. Lou talks a lot about hating to put on glass, and I have to agree it was a sticky mess of a job. But overall, it wasn't too difficult and the result seems very pleasing. I'm very eager to see how this turns out after everything is cured.

Wednesday, October 24, 2012

Starting on the glass

Very satisfying result tonight.

I got started glassing the hull. This is something that's been pretty intimidating to me, having never done it before.

I've been thinking about my strategy on this for a while...how much to glass, etc. After noodling on it, and in particular seeing what sizes of glass were available from Duckworks, I decided to cover the whole hull (including the sides all the way up to the sheer). I bought my glass in 50" width, which means I can lay it on the bottom with one edge on the keel and the other edge will come down all the way to the sheer. Or at least get close.

So I started the job tonight.

Here is my initial lay-down of fiberglass:


Next I took a dry paintbrush and started smoothing it out. That stuff is remarkable. I can't believe how loose the weave is. The wrinkles and bulges just seem to disappear.

After a few minutes of work, including cutting points on the bow and stern corners, I had this result:


Came out great. I did the other side the same way, overlapping it at the center. Except for the part where the centerboard will be. I left a smidge of a gap there so I could get the glass all the way (almost) to the sheer at the boat's widest point. Since I'll be cutting the centerboard slot, and glassing over the opening, etc, there's no problem leaving this gap here.

I decided to let this "rest" overnight. Hopefully, whatever minor wrinkles there are will soften out.

At the moment, the plan is to get up in the morning and lay down the first layer of epoxy. Not sure how long that will take, but I'm guessing a couple of hours at the most (optimistic?). I'm going to use the "slow" hardener, and its pretty cool out, so I'm hoping its still tacky when I get home from work, at which time I will put on another coat. Then the following morning I'll go back with a coat of epoxy loaded with micro-balloons, then let that cure and hopefully be able to hit it with a longboard on Sunday.

That's the plan anyway. We'll see how it goes.

Monday, October 22, 2012

Finishing off the beams

First order of business tonight was to get the belt sander running again. I stopped at a local tool supply place this morning and picked up a new power cord.


What I learned in this is that it wasn't necessary to take the side cover off the sander. You can do the whole thing inside the handle. Oh well. If I ever have to do it again, next time I'll know. After an hour or so of messing around, its as good as new:


From there, I took the deck beams and sanded them smooth, taking off the epoxy squeeze-out and evening off the laminations. What I found in the process of gluing those up it is all but impossible to keep the various layers perfectly lined up. They all wanted to slide around a tad. In the end, they were off by a smidge (like maybe 1/32"). No problem. The belt sander made quick work of evening them out.


Those came out really nice. The spring-back from the jig seems to be pretty much identical on each of them, so they should lay out on the deck very well.

Oh, and be careful with the sander:


(That looks worse than it is...)